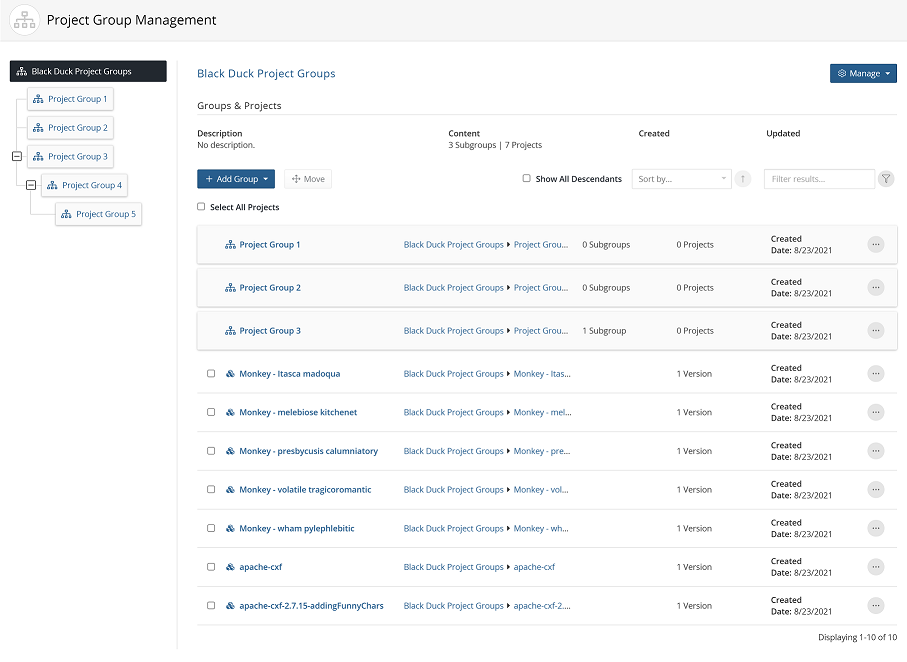
Editing a Project Group
Once you have created a project group, you can add project and project group children, individual members, and/or user groups. You can also change the project group's name or description as well as set the option to validate the generation of SBOM reports against policies for projects belonging to specific project groups.
To do so, follow the steps listed below:
-
Log in to Black Duck.
-
Click
 .
. -
Select Project Groups to display the Project Group Management page.

Editing the name or description
By default the root level project group is called "Black Duck Project Groups" but it can be renamed.
-
Click
and select Settings from the dropdown menu.
-
Edit the name of the project group in the Group Name field. This field is mandatory.
-
Edit the description for the project group in the Description field. This field is optional.
-
Click Save. The Project Group Management page updates to display the new group.
Adding project sub-groups
-
Click
and select Groups and Projects from the dropdown menu.
-
Click
and select Create New... from the dropdown menu.
-
In the Create New Project Group dialog box:
-
Type the name of the project group in the Group Name field. This field is mandatory.
-
Type a description for the project group in the Description field. This field is optional.
-
Click Save. The Project Group Management page updates to display the new group.
-
Removing project sub-groups
-
Select the desired project group from the project group tree in the left-hand panel. This displays all child project groups in the right-hand panel.
-
Click
-
Select Delete from the dropdown menu.
-
Click Delete from the confirmation dialog box.
If the project group is a child of a parent group:
-
Select the parent of the desired project group from the project group tree in the left-hand panel. This displays all project sub-groups for that project group in the right-hand panel.
-
Click
-
Select Delete from the dropdown menu.
-
Click Delete from the confirmation dialog box.
Moving a project group to a different project group
-
Select the parent of the desired project group from the project group tree in the left-hand panel. This displays all child project groups for that project group in the right-hand panel.
-
Click
-
Select Move
-
Select a project group game from the Group Name dropdown menu presented in the Move Selected Group to... dialog box.
-
Click Save to confirm the move.
Moving another project group into the selected group
-
Select the project group from the project group tree in the left-hand panel. This will display the details for the project group itself.
-
Click
.
-
Select Move existing...
-
Select a project group game from the Group Name dropdown menu presented in the Move Selected Group to... dialog box. Please note, a project group cannot be moved into the selected project group if it is an ancestor of the selected project group.
-
Click Save to confirm the move.
Adding a member to a project group
-
Select the desired project group from the project group tree in the left-hand panel.
-
Click
and select Members from the dropdown menu.
-
Click
.
-
Type or select a user name from the Users dropdown menu to open a list of members.
-
Select any role(s) that user will have for that project group. For more details regarding user roles, see Understanding roles.
-
Click Save.
Removing a member from a project group
-
Select the desired project group from the project group tree in the left-hand panel.
-
Click
and select Members from the dropdown menu.
-
Click
.
-
Select Delete Direct Access.
-
Click Delete from the confirmation dialog box.
Editing a member's roles in a project group
-
Select the desired project group from the project group tree in the left-hand panel.
-
Click
and select Members from the dropdown menu.
-
Click
.
-
Select Edit Direct Access.
-
Add or remove any role(s) that user will have for that project group. For more details regarding user roles, see Understanding roles.
-
Click Save.
Adding a user group to a project group
-
Select the desired project group from the project group tree in the left-hand panel.
-
Click
and select User Groups from the dropdown menu.
-
Click
.
-
Type or select a user name from the User Group dropdown menu to open a list of user groups.
-
Select any role(s) that user group will have for that project group. For more details regarding user roles, see Understanding roles.
-
Click Save.
Removing a user group from a project group
-
Select the desired project group from the project group tree in the left-hand panel.
-
Click
and select User Groups from the dropdown menu.
-
Click
.
-
Select Delete Direct Access.
-
Click Delete from the confirmation dialog box.
Enabling or disabling SBOM report validation
When setting is enabled, the ability to generate SBOM reports will be disabled if the project has policy violations.
-
Select the desired project group from the project group tree in the left-hand panel.
-
Click
and select Settings from the dropdown menu.
-
Scroll to the Reports section.
-
Check or uncheck the Don't generate SBOM reports for projects with policy violations checkbox.
-
Select either:
- Apply setting to all projects in this group only: Selecting this option will make it so that only this specific project group will have validation enabled when generating a SBOM report.
- Apply setting to all projects in this group and child groups: Selecting this option will make it so this project group and all its child groups will have validation enabled generating a SBOM report.
