Viewing LTS project versions
To view the list of LTS project versions:
-
Log in to Black Duck.
-
Select the project name using the Watching or My Projects dashboard. The Project Name page appears.
-
Click the Long-Term Support (LTS) Versions tab.

What can I do on the Long-Term Support (LTS) Versions tab?
From the Long-Term Support (LTS) Versions tab, you can:
-
Filter the table to help find desired versions. You can filter by:
-
View specific LTS project versions BOMs. Click the desired project version in the table brings you to its Components tab to view its BOM.
-
Delete a LTS project version. Click
 and select Delete.
Viewing a LTS project version BOM
Clicking a project version will open the Component sidebar, displaying the following information:
-
Origins. The component's unique identifier (UUID) and human-readable component name, component version name, external namespace, and external identifier.
-
License. The component's license.
-
Vulnerabilities. Displays a count of the component's known vulnerabilities (Critical, High, Medium, Low). This section also displays upgrade recommendations to mitigate risk.
-
SBOM Fields. The SBOM values for the component's PURL, CPE, Originator, Supplier, License Comment, Package Valid Until Date, and Download Location.
Vulnerabilities tab
The Vulnerabilities tab provides a complete list of all known vulnerabilities associated to the component's version. In addition to viewing vulnerability details, you can now set the remediation status for each vulnerability. This status helps track whether a vulnerability has been addressed or remains unresolved.
To set the status of a vulnerability:
-
Select the desired vulnerability or vulnerabilities by:
-
Checking the checkbox next to the desired vulnerability and then clicking
 . You can select multiple vulnerabilities to remediate using
this method.
 -
Expanding the vulnerability by clicking the
 and either:
-
Check the checkbox next to the desired vulnerability and then click
 .
. -
Hover your mouse cursor over the Component or Status areas and then click the
 .
.
-
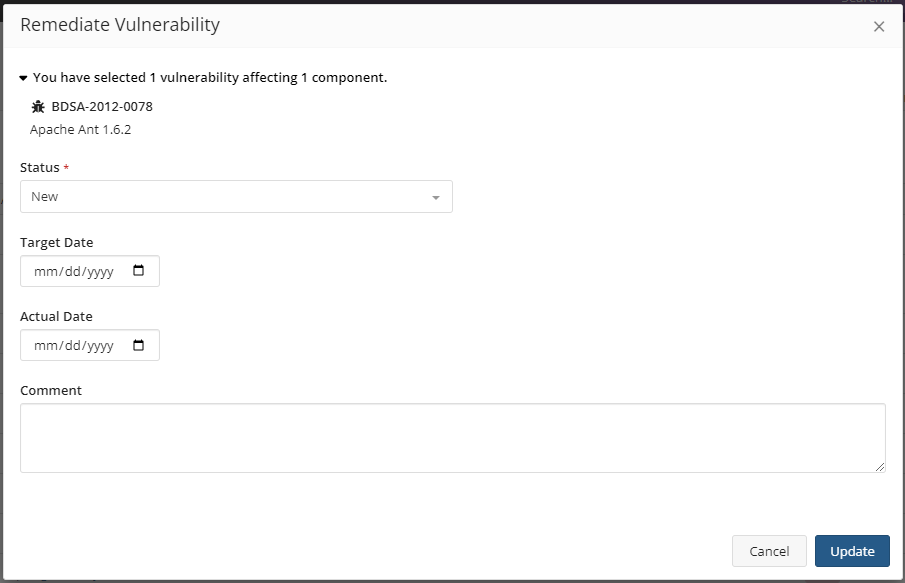
This opens the Remediate Vulnerability modal. Clicking the
 displays the selected vulnerability and the affected component
version.
-
-
Choose a status from the Status drop down menu. Click here for more information on remediation statuses.
-
Select a Target Date or Actual Date if updating the vulnerability remediation. Click here for more information on these two fields.
-
Add any comments in the Comments field.
-
Click Update.
Reports tab
The Reports tab contains the SBOM report created when the project version was converted to LTS.
Details tab
The Details tab contains the same information as displayed when the project was Active.
Settings tab
You can delete the project version from the Settings tab. Once you delete a version, you can't restore it and you will lose all information related to it.
